
Application objects for app partners
Learn how to build shared schema custom objects that automatically appear in your installer's Klaviyo accounts when they install your app.
Before you begin
Before you start, check out the general API overview and the Custom Objects API overview to familiarize yourself
with the core custom objects data model.
Application objects build on custom objects by introducing a shared schema that you define one
time in your developer account and that automatically becomes available in every Klaviyo account
that installs your app. This enables your app to sync structured, stateful data (e.g.,
reservations, loyalty rewards, subscriptions) that can be linked to your customers' Klaviyo profiles.
You will learn
This guide covers:
- How application objects differ from standard custom objects
- How to create an application object using the Custom Objects Definition APIs
- The review and approval process for getting your application object into production
This API requires the following scopes:
custom-objects:readcustom-objects:write
You must add these scopes to your app and include them in your install URL parameters.
Customers who have already installed your app will need to re-authenticate to accept
the new scopes for object data to begin syncing.
How application objects work
Standard custom objects use a private schema where each Klaviyo account defines and
manages its own objects independently. Application objects use a shared schema, which means:
- You define the object type one time in your developer or staging account, tied to your application ID.
- The object type is automatically linked to every Klaviyo account that installs your app.
- Schema updates propagate to all accounts using the shared schema when you publish a new version.
- You control the object definition — your customers do not need to set up or configure the object themselves.
Key concepts
| Concept | Description |
|---|---|
| Shared schema | An object schema with visibility set to "shared". It is referenced across all accounts that install your app. |
| Namespace | A string in the format applications/<your_app_id> that associates the schema with your application. |
| Linking | When a customer installs your app, the shared schema object type is automatically linked to their account. |
| Unlinking | When a customer uninstalls your app, the object type is unlinked. Object records persist in the customer's account but no longer receive schema updates. |
Step 1: Plan your application object
Before you start building, plan your object's structure:
- Define your object type. What real-world concept does it represent? Examples: Reservation, Reward, Subscription, Wishlist Item, Review. Your application can define up to 8 shared schema object types.
- Identify properties. What fields should each object record contain? Each object can have up to 30 properties (not including the unique identifier). Supported data types:
string,int,float,boolean,timestamp. - Determine the profile relationship. How does each record connect to a Klaviyo profile? You must provide at least one profile identifier (email, phone number, external ID, or Klaviyo ID).
- Consider use cases. How will Klaviyo customers use this data? Think about segmentation (e.g., "customers with an active reservation"), flow triggers (e.g., "reservation check-in date is tomorrow"), and template personalization (e.g., displaying reservation details in a pre-arrival email).
Plan carefully before building. The Custom Objects API does not currently support deletion or breaking changes to shared schemas. Mistakes are difficult to remediate after your object is published.
Step 2: Build your application objects in staging
Build and test your application objects in a staging or development account before they can be reviewed and promoted to production. Use your staging application ID throughout this process.
The creation workflow follows the same steps as programmatic custom objects setup, with two key differences:
- Set
visibilityto"shared"(instead of"private") on both the object type and data source. - Set
namespaceto"applications/<your_staging_app_id>"on both the object type and data source.
Both the object type and data source must use the same namespace and visibility.
This walkthrough creates two related object types — Hotel and Reservation — to demonstrate profile relationships, object-to-object relationships, and the recommended record structure for production workloads. If your object type links to another object type, create the target object first and activate it before creating the relationship.
All Custom Objects API endpoints use the revision header
revision: 2026-07-15.
Build the Hotel object
The Hotel object is a simple reference object with a profile relationship to its managers.
Step 2a: Create the Hotel data source
{
    "data": {
        "type": "data-source",
        "attributes": {
            "visibility": "shared",
            "namespace": "applications/<YOUR_STAGING_APP_ID>",
            "title": "Hotel Directory",
            "description": "Hotel properties managed on our platform"
        }
    }
}
Save the returned id as <HOTEL_DATA_SOURCE_ID>.
Step 2b: Create the Hotel object type
Create the object type with its schema in a single call using the Create Object Type endpoint. The embedded object-schema under attributes creates a draft schema and source mapping automatically.
{
    "data": {
        "type": "object-type",
        "attributes": {
            "visibility": "shared",
            "namespace": "applications/<YOUR_STAGING_APP_ID>",
            "title": "Hotel",
            "description": "Hotel properties managed on our platform",
            "object-schema": {
                "data": {
                    "type": "object-schema",
                    "attributes": {
                        "properties": [
                            {"id": 1, "name": "name", "type": "string", "description": "Hotel name"},
                            {"id": 2, "name": "location", "type": "string", "description": "City or address"}
                        ]
                    }
                }
            }
        }
    }
}
Save the draft-schema ID from the response relationships — you'll use it as <HOTEL_DRAFT_SCHEMA_ID> for the remaining Hotel steps and as the source mapping ID.
Step 2c: Create the Hotel profile relationship
Link Hotels to Klaviyo profiles (managers) using the profile relationship endpoint on the draft schema. The id must always be the static string "profile".
POST /api/object-schemas/<HOTEL_DRAFT_SCHEMA_ID>/relationships/profile-object-schemas
{
    "data": [
        {
            "type": "profile-object-schema",
            "id": "profile",
            "meta": {
                "name": "managers",
                "description": "The managers responsible for this property"
            }
        }
    ]
}
Save the relationship_id from the response meta as <HOTEL_MANAGERS_REL_ID>.
Step 2d: Configure the Hotel source mapping
Configure property and relationship mappings using the Update Source Mapping endpoint. The source mapping ID is the same as the draft schema ID.
This example uses the recommended structured record layout with object properties under object_record and profile identifiers under relationships, supporting many-to-many profile relationships via wildcard expansion.
{
    "data": {
        "type": "source-mapping",
        "id": "<HOTEL_DRAFT_SCHEMA_ID>",
        "attributes": {
            "property_mappings": [
                {"id": 1, "type": "simple", "source": {"source_id": "<HOTEL_DATA_SOURCE_ID>", "id_path": "$['object_record']['hotel_id']", "data_path": "$['object_record']['name']"}},
                {"id": 2, "type": "simple", "source": {"source_id": "<HOTEL_DATA_SOURCE_ID>", "id_path": "$['object_record']['hotel_id']", "data_path": "$['object_record']['location']"}}
            ],
            "relationship_mappings": [
                {
                    "relationship_id": "<HOTEL_MANAGERS_REL_ID>",
                    "type": "simple",
                    "source": {
                        "source_id": "<HOTEL_DATA_SOURCE_ID>",
                        "id_path": "$['relationships']['managers'][*]['id']",
                        "type": "profile",
                        "related_id_paths": [
                            {"identifier_type": "email", "path": "$['relationships']['managers'][*]['email']"}
                        ]
                    }
                }
            ]
        }
    }
}
Step 2e: Ingest Hotel test data
Ingest records using the Bulk Create Data Source Records endpoint. Note the structured record layout — object_record contains properties, and relationships.managers contains profile identifier tuples with an id that ties each manager back to the hotel.
{
    "data": {
        "type": "data-source-record-bulk-create-job",
        "attributes": {
            "data-source-records": {
                "data": [
                    {
                        "type": "data-source-record",
                        "attributes": {
                            "record": {
                                "object_record": {
                                    "hotel_id": "HTL-001",
                                    "name": "The Seaside Hotel",
                                    "location": "Boston, MA"
                                },
                                "relationships": {
                                    "managers": [
                                        {"id": "HTL-001", "email": "[email protected]"},
                                        {"id": "HTL-001", "email": "[email protected]"}
                                    ]
                                }
                            }
                        }
                    }
                ]
            }
        },
        "relationships": {
            "data-source": {
                "data": {
                    "type": "data-source",
                    "id": "<HOTEL_DATA_SOURCE_ID>"
                }
            }
        }
    }
}
Step 2f: Activate the Hotel schema
{
    "data": {
        "type": "object-schema",
        "id": "<HOTEL_DRAFT_SCHEMA_ID>",
        "attributes": {
            "status": "active"
        }
    }
}
The response shows status publishing while records are being processed — this typically transitions to active within a few minutes. Wait for the Hotel to reach active status before proceeding — the Reservation object needs to reference the Hotel's active schema.
You can only update a schema's properties and relationships while it is in
draftstatus. Once activated, the schema is locked to only allow new non-required properties. Plan your properties carefully. The schema's search and display configuration is the exception, and can be updated at any time.
Build the Reservation object
The Reservation object has a profile relationship (guests) and an object-to-object relationship to the Hotel created above.
Step 2g: Create the Reservation data source
{
    "data": {
        "type": "data-source",
        "attributes": {
            "visibility": "shared",
            "namespace": "applications/<YOUR_STAGING_APP_ID>",
            "title": "Reservation Database",
            "description": "The source of truth for reservations from our platform"
        }
    }
}
Save the returned id as <RESERVATION_DATA_SOURCE_ID>.
Step 2h: Create the Reservation object type
{
    "data": {
        "type": "object-type",
        "attributes": {
            "visibility": "shared",
            "namespace": "applications/<YOUR_STAGING_APP_ID>",
            "title": "Reservation",
            "description": "Customer reservation information synced from our platform",
            "object-schema": {
                "data": {
                    "type": "object-schema",
                    "attributes": {
                        "properties": [
                            {"id": 1, "name": "check_in_date", "type": "timestamp", "description": "Scheduled check-in date"},
                            {"id": 2, "name": "check_out_date", "type": "timestamp", "description": "Scheduled check-out date"},
                            {"id": 3, "name": "status", "type": "string", "description": "Current reservation status (e.g., confirmed, checked_in, cancelled)"},
                            {"id": 4, "name": "guest_count", "type": "int", "description": "Number of guests"}
                        ]
                    }
                }
            }
        }
    }
}
Save the draft-schema ID from the response as <RESERVATION_DRAFT_SCHEMA_ID>.
Step 2i: Create the Reservation profile relationship
POST /api/object-schemas/<RESERVATION_DRAFT_SCHEMA_ID>/relationships/profile-object-schemas
{
    "data": [
        {
            "type": "profile-object-schema",
            "id": "profile",
            "meta": {
                "name": "guests",
                "description": "The guests associated with this reservation"
            }
        }
    ]
}
Save the relationship_id from the response meta as <GUESTS_REL_ID>.
Step 2j: Create the Reservation → Hotel object relationship
Link Reservations to Hotels using the object schema relationships endpoint. The id is the active schema ID of the Hotel object (the current-schema from the Hotel object type response, which is the same as <HOTEL_DRAFT_SCHEMA_ID> after activation).
POST /api/object-schemas/<RESERVATION_DRAFT_SCHEMA_ID>/relationships/object-schemas
{
    "data": [
        {
            "type": "object-schema",
            "id": "<HOTEL_DRAFT_SCHEMA_ID>",
            "meta": {
                "name": "hotel",
                "description": "The hotel where this reservation is booked"
            }
        }
    ]
}
Save the relationship_id from the response meta as <HOTEL_REL_ID>.
Step 2k: Configure the Reservation source mapping
The Reservation source mapping includes property mappings, a profile relationship mapping (guests), and an object-to-object relationship mapping (hotel). The object relationship uses "type": "custom-object" with a related_id_path that points to the hotel identifier in the record.
{
    "data": {
        "type": "source-mapping",
        "id": "<RESERVATION_DRAFT_SCHEMA_ID>",
        "attributes": {
            "property_mappings": [
                {"id": 1, "type": "simple", "source": {"source_id": "<RESERVATION_DATA_SOURCE_ID>", "id_path": "$['object_record']['reservation_id']", "data_path": "$['object_record']['check_in_date']"}},
                {"id": 2, "type": "simple", "source": {"source_id": "<RESERVATION_DATA_SOURCE_ID>", "id_path": "$['object_record']['reservation_id']", "data_path": "$['object_record']['check_out_date']"}},
                {"id": 3, "type": "simple", "source": {"source_id": "<RESERVATION_DATA_SOURCE_ID>", "id_path": "$['object_record']['reservation_id']", "data_path": "$['object_record']['status']"}},
                {"id": 4, "type": "simple", "source": {"source_id": "<RESERVATION_DATA_SOURCE_ID>", "id_path": "$['object_record']['reservation_id']", "data_path": "$['object_record']['guest_count']"}}
            ],
            "relationship_mappings": [
                {
                    "relationship_id": "<GUESTS_REL_ID>",
                    "type": "simple",
                    "source": {
                        "source_id": "<RESERVATION_DATA_SOURCE_ID>",
                        "id_path": "$['relationships']['guests'][*]['id']",
                        "type": "profile",
                        "related_id_paths": [
                            {"identifier_type": "email", "path": "$['relationships']['guests'][*]['email']"},
                            {"identifier_type": "phone", "path": "$['relationships']['guests'][*]['phone']"}
                        ]
                    }
                },
                {
                    "relationship_id": "<HOTEL_REL_ID>",
                    "type": "simple",
                    "source": {
                        "source_id": "<RESERVATION_DATA_SOURCE_ID>",
                        "id_path": "$['object_record']['reservation_id']",
                        "type": "custom-object",
                        "related_id_path": "$['object_record']['hotel_id']"
                    }
                }
            ]
        }
    }
}
Step 2l: Ingest Reservation test data
Ingest at least a few records before activating to confirm your data and mappings are configured correctly. Note the structured layout with object_record (properties + foreign keys) and relationships.guests (profile identifier tuples).
{
    "data": {
        "type": "data-source-record-bulk-create-job",
        "attributes": {
            "data-source-records": {
                "data": [
                    {
                        "type": "data-source-record",
                        "attributes": {
                            "record": {
                                "object_record": {
                                    "reservation_id": "RES-001",
                                    "check_in_date": "2026-05-15T15:00:00Z",
                                    "check_out_date": "2026-05-18T11:00:00Z",
                                    "status": "confirmed",
                                    "guest_count": 2,
                                    "hotel_id": "HTL-001"
                                },
                                "relationships": {
                                    "guests": [
                                        {"id": "RES-001", "email": "[email protected]", "phone": "+15550002000"},
                                        {"id": "RES-001", "email": "[email protected]", "phone": "+15550002001"}
                                    ]
                                }
                            }
                        }
                    }
                ]
            }
        },
        "relationships": {
            "data-source": {
                "data": {
                    "type": "data-source",
                    "id": "<RESERVATION_DATA_SOURCE_ID>"
                }
            }
        }
    }
}
Step 2m: Activate the Reservation schema
{
    "data": {
        "type": "object-schema",
        "id": "<RESERVATION_DRAFT_SCHEMA_ID>",
        "attributes": {
            "status": "active"
        }
    }
}
Activation validates your entire configuration and processes all ingested raw data into custom object records. The response shows status publishing while records are being processed — this typically transitions to active within a few minutes depending on data volume.
At this point, both objects are published for your staging application and ready to be tested. Reservation RES-001 is linked to Hotel HTL-001 and to two guest profiles (Jane and John Doe).
Customize search and display for installers (optional)
Each object schema has a configuration that controls which properties your installers can search on and how records are displayed in their Klaviyo accounts, including the record title, images, and record explorer columns. We recommend customizing it so installers can find and recognize your records without extra setup. See Configure search and display in the Custom Objects API overview for the full list of fields.
For a shared schema, the configuration is managed by your partner account and applied to every account that installs your app. Installers can view the configuration but cannot change it.
This example makes Hotel records searchable by name (property 1) and location (property 2) and uses the hotel name as the record title. Use the Update Object Schema endpoint with the beta revision header revision: 2026-07-15.pre:
PATCH /api/object-schemas/<HOTEL_DRAFT_SCHEMA_ID>
{
    "data": {
        "type": "object-schema",
        "id": "<HOTEL_DRAFT_SCHEMA_ID>",
        "attributes": {
            "configuration": {
                "searchable_property_ids": [1, 2],
                "title_property_id": 1,
                "primary_image_url_property_id": null,
                "thumbnail_image_url_property_id": null,
                "record_explorer_display_property_ids": [1, 2]
            }
        }
    }
}
Unlike properties and relationships, you can update configuration on an active schema without creating a new draft — <HOTEL_DRAFT_SCHEMA_ID> is still the schema ID after activation (it's the Hotel object type's current-schema). The configuration attribute is replaced in full, so include every field in the request.
Changes to
searchable_property_idsare applied asynchronously to every installer's account. Klaviyo rebuilds the search index for the affected properties in each account, and existing records become searchable by a newly added property once that backfill completes. Track progress with thesearch_indexed_property_idsandsearch_indexing_property_idsfields on the object type.
Step 3: Test your application object
Before submitting for review, verify that your application object works correctly:
- Confirm object linking. Install your staging app in a separate test account and verify that the object type appears automatically.
- Ingest records. Send data through your app and confirm that records appear on the correct profiles.
- Test segmentation. Create a segment using your object's properties (e.g., "status equals confirmed") and verify it includes the expected profiles.
- Test flow triggers. If applicable, set up a date-triggered flow using one of your object's timestamp properties and verify it triggers correctly.
- Test template personalization. Create an email template that pulls data from your object and verify the personalization tags render correctly.
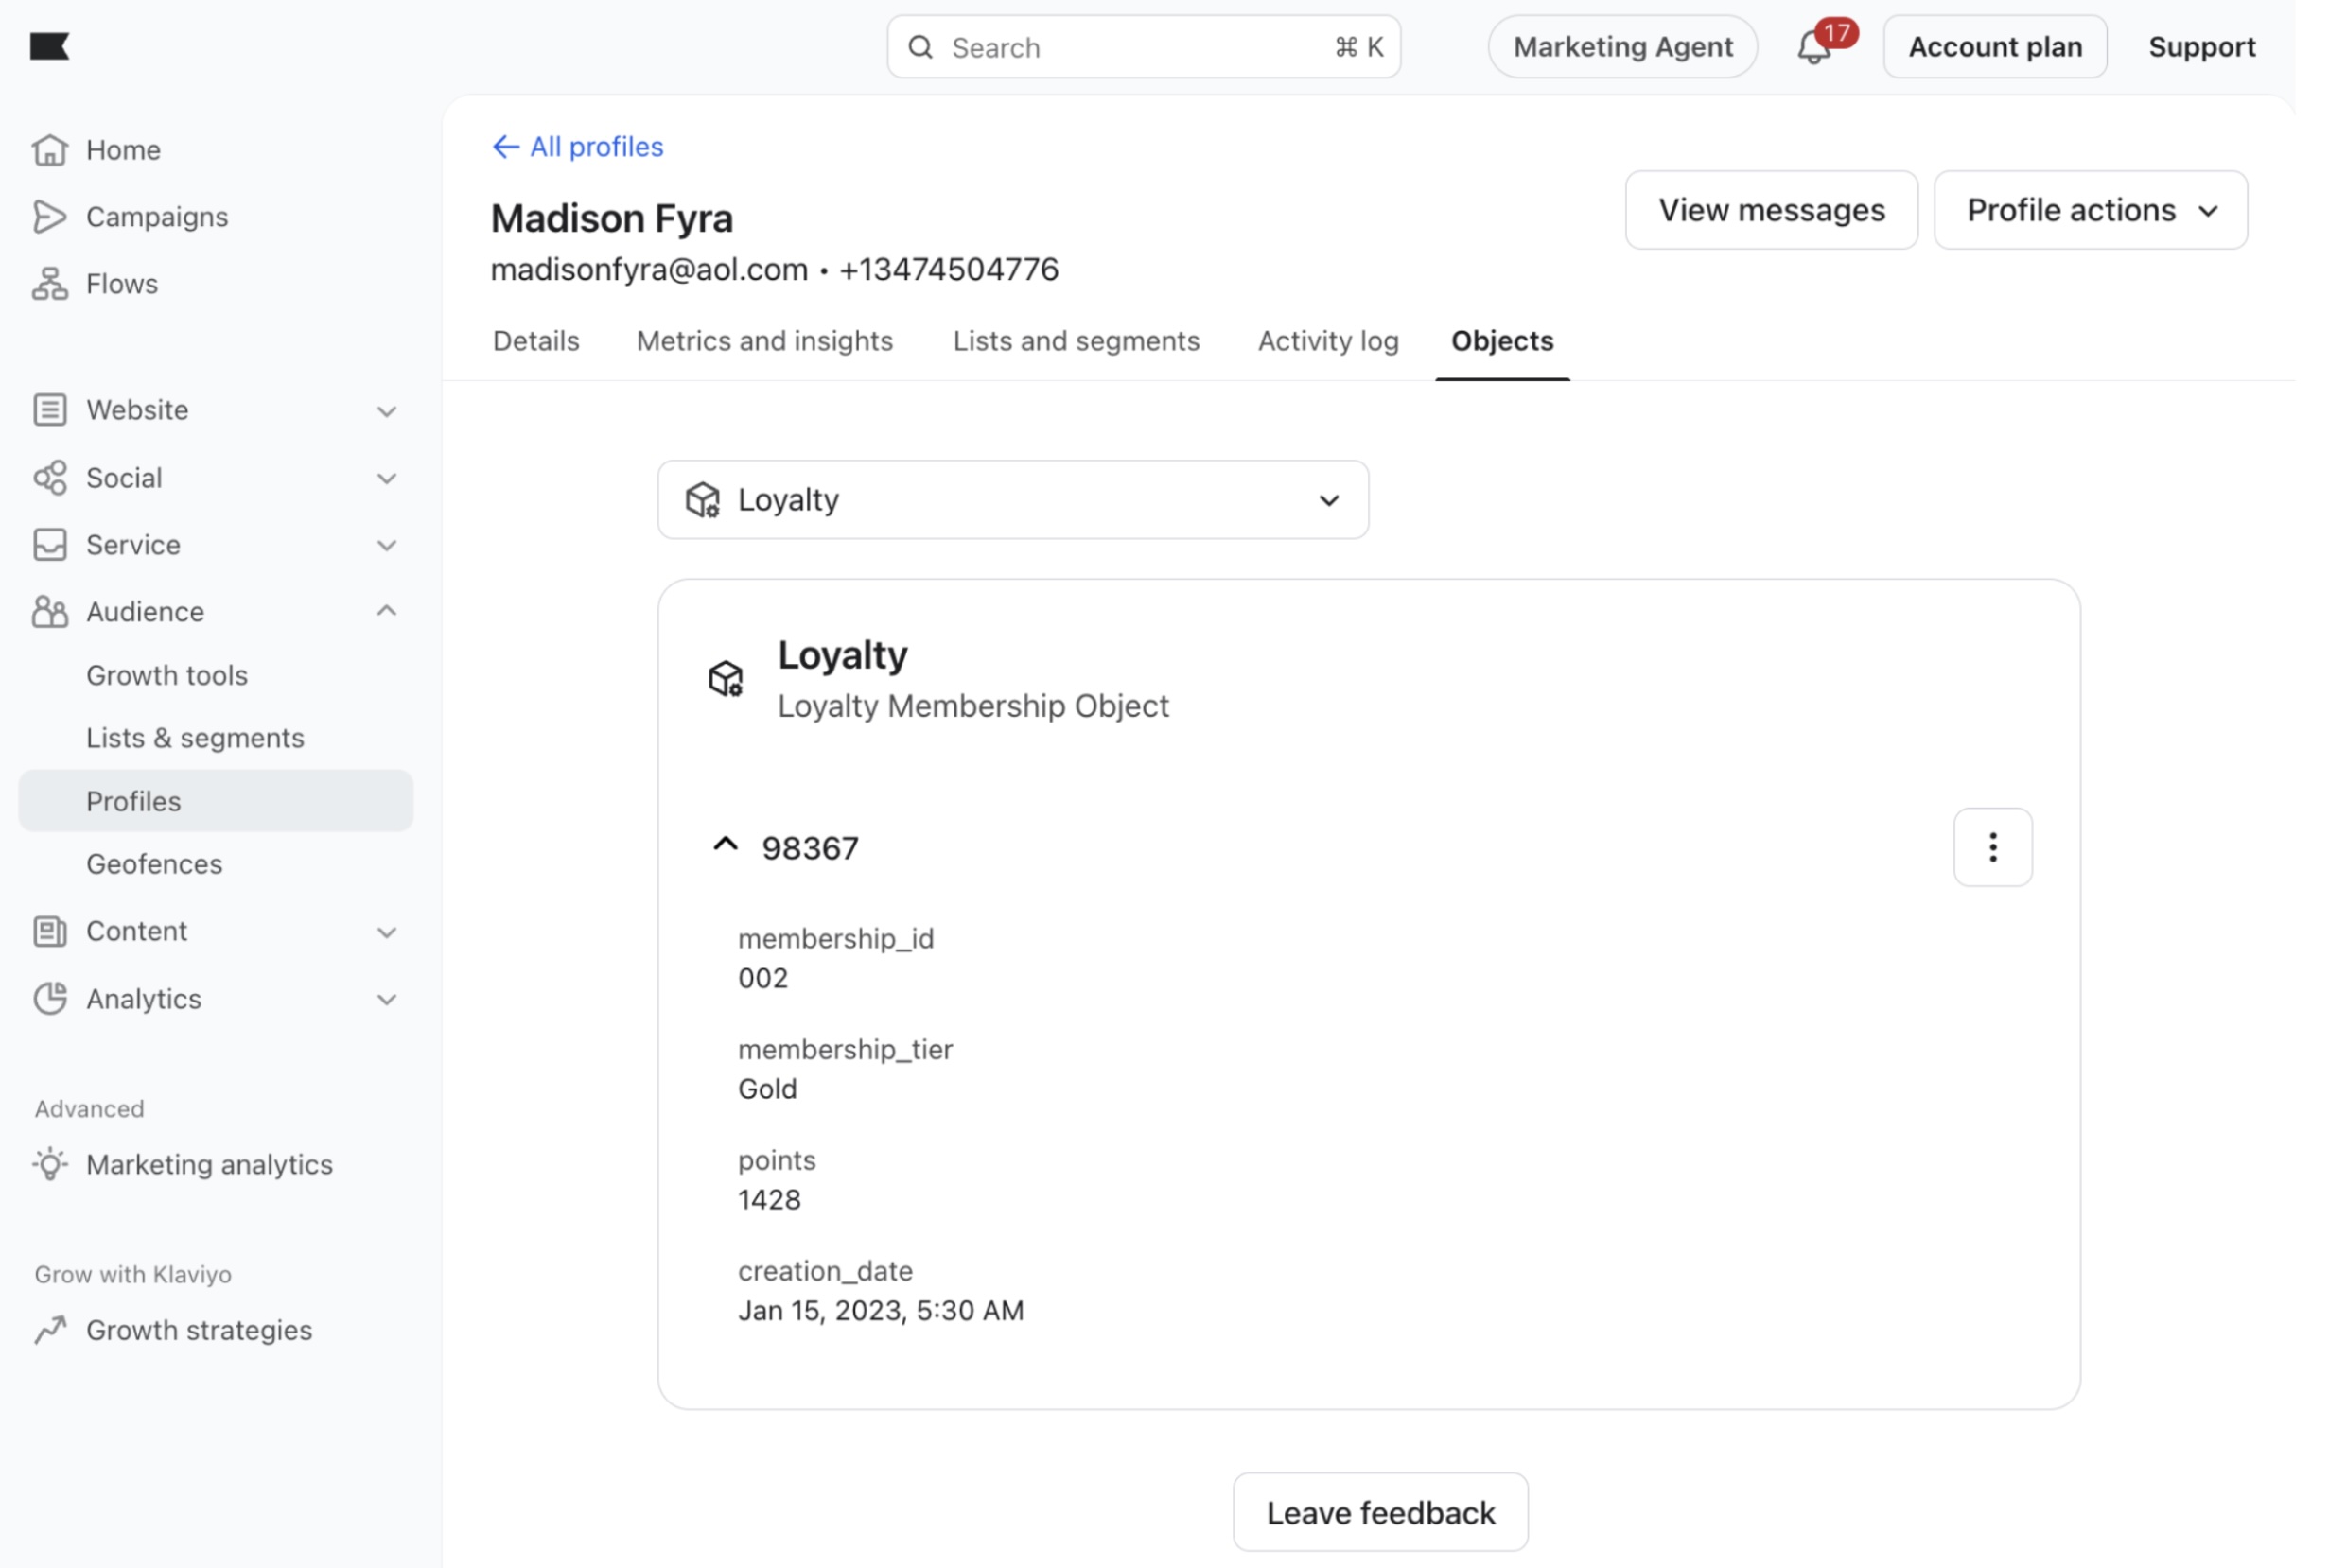
Step 4: Submit for review
Once you have tested your application object in staging, submit it for Klaviyo's review. The review ensures your object
follows best practices and is correctly structured before it goes live with customers.
Review submission process
- Add custom object scopes to your production app. In the Klaviyo UI, navigate to your production app settings and add the
custom-objects:readandcustom-objects:writescopes. Also include these scopes in your install URL parameters. - Submit the Application Object Review Form. Complete the form with the following details:
- Your staging account ID
- Your staging application ID
- A description of your object type, its properties, and intended use cases
- Confirmation that your object is built and activated in your staging account
- Grant Klaviyo remote access. The review team may request remote edit access to your staging account to test your object. Follow these instructions to grant access.
What happens during review
The Klaviyo review team will:
- Verify your object schema is correctly structured with appropriate property names, types, and descriptions
- Confirm the profile relationship is properly configured
- Test data ingestion and record creation in your staging environment
- Validate that the object supports the intended use cases (segmentation, flows, personalization)
- Provide feedback on any required changes
Review outcomes
| Outcome | Next steps |
|---|---|
| Approved | Klaviyo clones your object from your staging application to production. See Step 5. |
| Minor fixes needed | The review team requests specific updates. Make the changes and confirm. |
| Significant issues | The review team provides detailed feedback. Address the issues, re-test, and resubmit. |
Important: Do not create your application object directly in your production app.
Always build in staging first. The review team uses tooling to clone approved
objects from staging to production to ensure consistency.
Step 5: Go live in production
After your application object passes review, the Klaviyo team clones it to your production application on your behalf.
What Klaviyo does
- Clones your approved object definition (schema, source mapping, relationships) from your staging app to your production app.
- Associates the shared schema with your published production application.
- Notifies you with your new production data source ID and confirmation of the cloning.
What you need to do
- Update your app to use the new data source ID. Your production data source ID is different from your staging data source ID. Update your app code to send data to the production data source.
- Find your production data source ID. Navigate to Integrations > Developers > Manage Apps > [Your App] > Objects > (three-dot menu) > View Definition > View sample payload.
- Encourage customers to re-authenticate. Customers who installed your app before you added custom object scopes need to re-authenticate to accept the new scopes. Until they do, the application object is not active for their account.
- Begin ingesting production data. Use the Bulk Create Data Source Records endpoint to start syncing live data.
Updating your application object
After your application object is live, you can update it by creating a new draft version of your schema:
- Create a draft version of your published object type using the Create Draft Schema endpoint.
- Update the draft schema with new or modified properties.
- Update the source mapping to reflect any changes.
- Activate the new schema version.
When you activate an updated schema, the changes propagate to all accounts that have installed your app. Existing object records are re-processed against the new schema.
To change only the search and display configuration, you don't need a new draft. Update configuration directly on the active schema as described in Customize search and display for installers.
Schema updates are additive only. You cannot remove existing properties or change a property's data type. Plan your schema carefully from the start.
Limitations and best practices
Current limitations
- No deletion. You cannot delete a shared schema object type via the API. If you need an object deleted, contact Klaviyo support.
- No breaking changes. You cannot remove properties, rename properties, or change property data types on an active schema.
- Object type limit. Applications currently support up to 8 shared schema object types.
- Property limits. Each object can have up to 30 properties (not including the unique identifier). Each property must not exceed 2 KB in size, and total record size must not exceed 8 KB.
Best practices
- Use descriptive property names. Your customers see property names in the Klaviyo UI when building segments, flows, and templates. Use clear, human-readable names (e.g.,
check_in_daterather thanci_dt). - Include a status property. If your object represents something with a lifecycle (e.g., a reservation, subscription, or reward), include a
statusproperty so customers can segment by state. - Provide timestamp properties. Timestamp properties enable date-triggered flows, which are one of the most powerful use cases for application objects.
- Keep objects separate. Model each distinct entity as its own object type rather than combining multiple concepts into one.
- Configure search and display. Set a descriptive title property and up to 3 searchable properties so installers can find your records by the values they know, such as a reservation status or hotel name. See Customize search and display for installers.
- Test thoroughly in staging. Verify segmentation, flows, and template personalization all work correctly before submitting for review.
Flow templates (optional)
Once your application object is live in production, you can create object-triggered flow templates for inclusion in Klaviyo's flow template library. This helps your customers quickly set up automations using your object data.
For documentation on flow template requirements and submission, see Submit flow templates for your app.
The flow template documentation currently states that flows must be event-triggered. For application objects, create object-triggered flows instead. You can reference object data within the emails in these flows.
Additional resources
- Custom Objects API overview — Full reference for the Custom Objects data model and API endpoints.
- Bulk Create Data Source Records, Create Data Source Record — Endpoint references for data ingestion.
- Create Object Type — Endpoint reference for creating object types.
- Submit flow templates for your app — Guide to creating flow templates that use your application object.
- Getting started with custom objects — Help center article for Klaviyo customers on using custom objects.
Updated 5 days ago