Use Klaviyo's Postman collections
Learn how to use our Postman collections to get started with Klaviyo's APIs
Postman is a useful web and desktop application for making API calls. Whenever we release an API revision, we update our Postman workspace with a new “collection,” or a group of saved requests to our latest endpoints. In this guide, you will learn how to fork our collections and make API requests in Postman.
We do not update older Postman collections. The older the collection you use, the more likely you’ll get errors. We recommend regularly updating your Klaviyo API usage and Postman collections accordingly.
Before you begin
- Create a Postman account for forking our collections.
- Create a Klaviyo test account for experimentation purposes. Making API calls with Postman will affect data in your account.
- Generate sample data in your test account.
Generate an API key
To test our API calls in Postman, you’ll need a private API key. If you already have one, securely copy it for later use.
-
From your Klaviyo test account’s API keys tab, select Create Private API Key. This will prompt you to generate a private API key with full access or a subset of our available scopes.
-
Enter an appropriate name for your key and set your API scopes. For your test account, we recommend creating a full access key to fully experience our APIs.
-
Click Create, and securely copy your key for later use.
Note that, for your production account, you should create your private API key(s) with only the scopes you need.
Fork our latest Postman collection
You’ll want to test our APIs with our latest Postman collection, as we do not update our older collections.
- To fork our latest Postman collection, head to our Postman profile.
- In the Our content section, click View Contents. This will expand a list of available collections.
- Scroll to the bottom of the list and click the Fork button on the "Latest Stable" collection.
You will be prompted to fork the collection, as shown below:
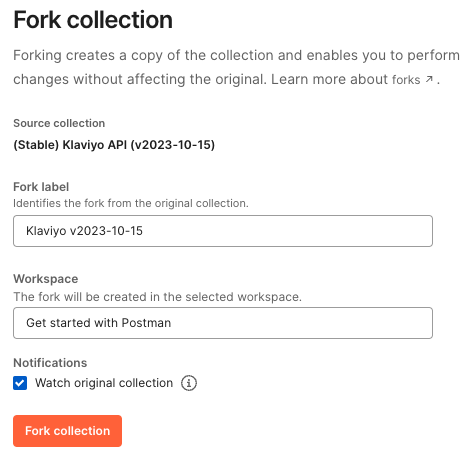
- Provide a fork label and select an available workspace from the Workspace dropdown. You can always move your forked collection to another workspace for organizational purposes.
- Click Fork collection.
You’ve just added our newest Postman collection to your workspace. Now, you can set up authorization and make Klaviyo API calls in Postman.
Set up authorization
Once you’ve forked our latest collection, you’ll need to set an API key as the authorization method for each request in the collection. You will learn how to set up a private API key for the full collection, so that you won’t have to set up authorization for each request. You’ll also learn how to test client-side calls with your public API key.
Authorization with a private API key
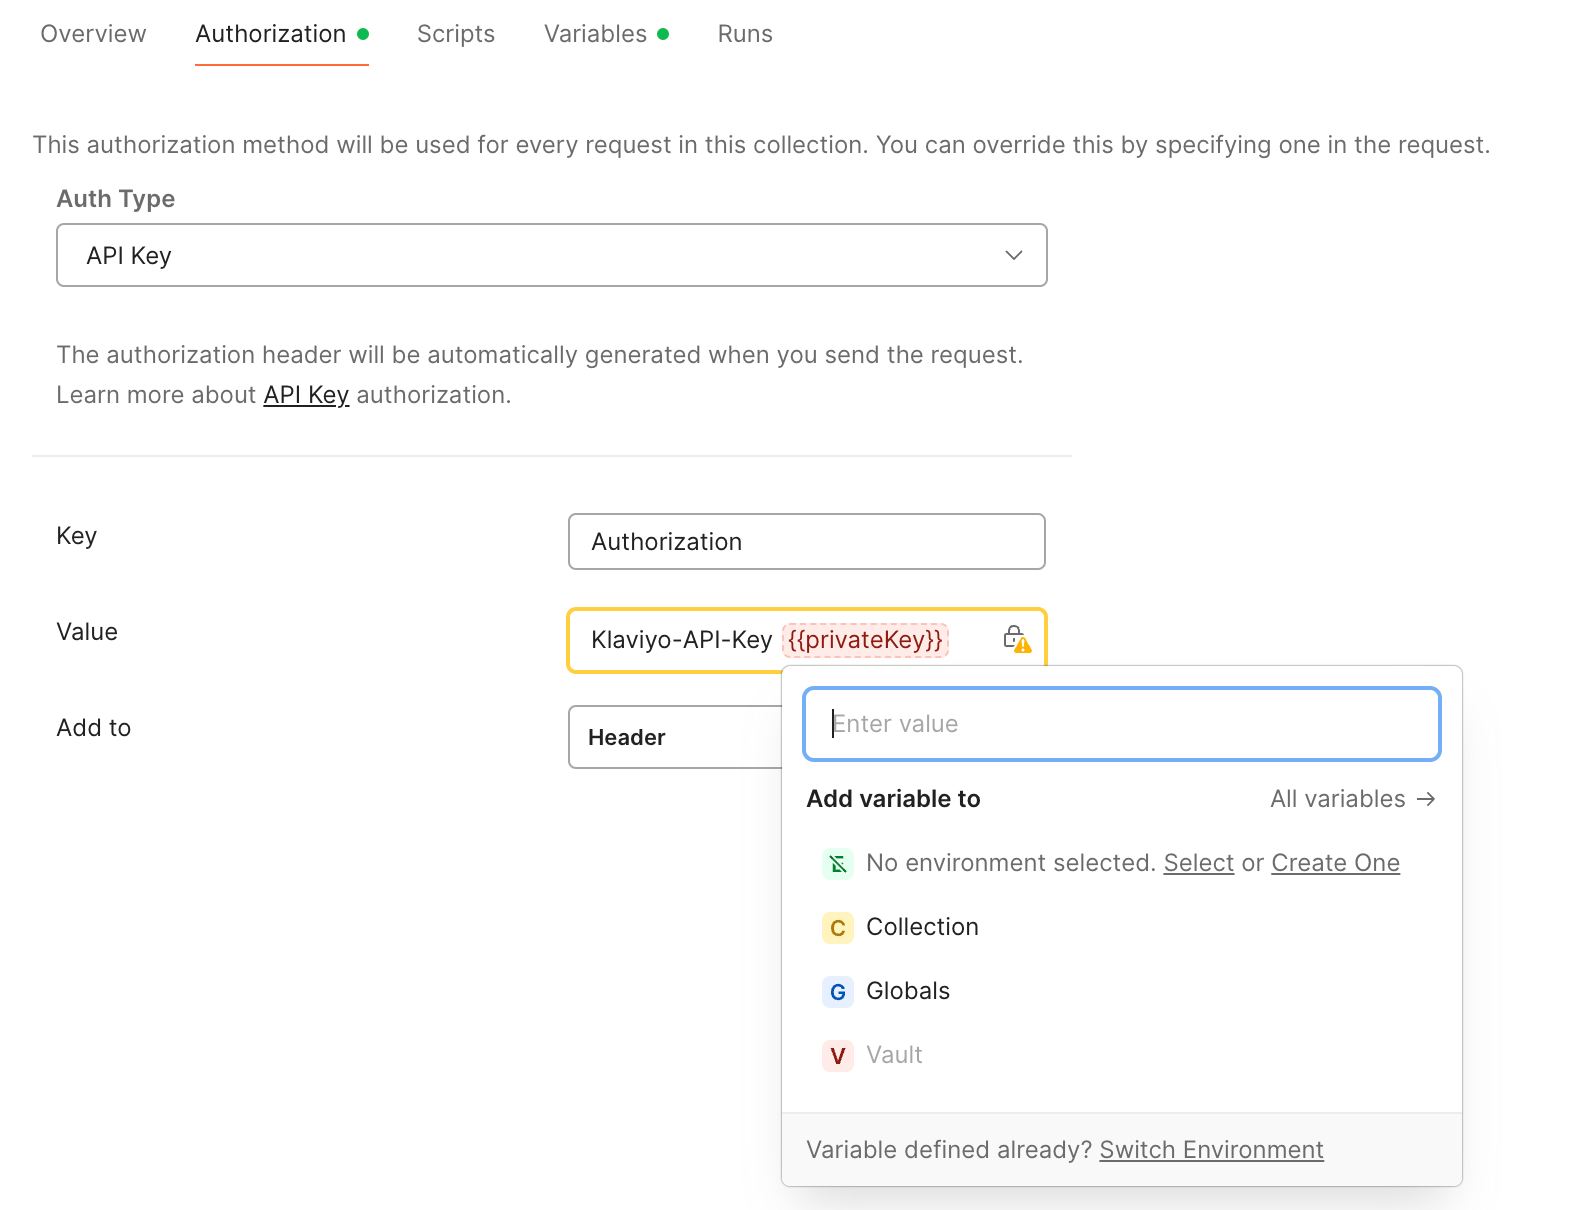
- Ensure that you are in the topmost tab of the collection, e.g., (Stable) Klaviyo API (v2023-10-15), and navigate to the Authorization tab in Postman.
- Hover over
{{privateKey}}. You will be prompted to provide a value. Paste your copied private API key and select a scope. Save the variable with the enter key.
Now when you click on a specific request, e.g., Get Events (within Events) and navigate to its Authorization tab, the type is automatically set to Inherit auth from parent, as shown below.
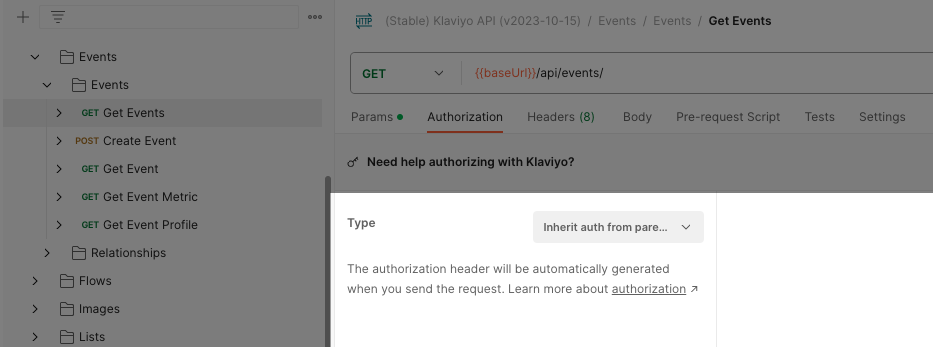
You can change the type in the Auth Type dropdown to API Key or select the Need help authorizing with Klaviyo? header to override the auth inherited by the collection with a different API key.
You may want to test the same collection with more than one private API key. In this case, you can change the key in specific requests, or create a new fork with a different private API key for authorization across requests. It’s good practice to give your API keys and forked collections memorable names for convenient swapping.
Client-side API calls
Note that you should use klaviyo.js, a JavaScript library fully managed by Klaviyo, for onsite tracking. For mobile use cases, such as creating push tokens, you can call Client API endpoints from our iOS and Android SDKs. You can also use our Client API for client-side applications that require calling our endpoints directly, e.g., creating client subscriptions through a custom form. Check out our documentation for using server-side vs client-side APIs.
Never use a private API key with our client endpoints.
Note that when you previously set up authorization for the collection, this did not apply to our client-side API requests. Client-side API calls only require a public API key, also known as a company_id, for authentication.
- From your Klaviyo test account’s API keys tab, copy the public API key at the top of the page.
- Navigate to a Client API request, e.g., Create Client Subscription.
- Hover over
{{companyId}}in the request URL. You will be prompted to provide a value. Paste your copied public API key and select a scope in the Add to dropdown. We recommend setting the scope to Global, so that all collections in your personal Klaviyo workspace can access the shared company ID.
Navigate your collection
On the left hand sidebar of Postman, you will see all of the available Klaviyo APIs to test. Let’s click on the Profiles folder within the collection.
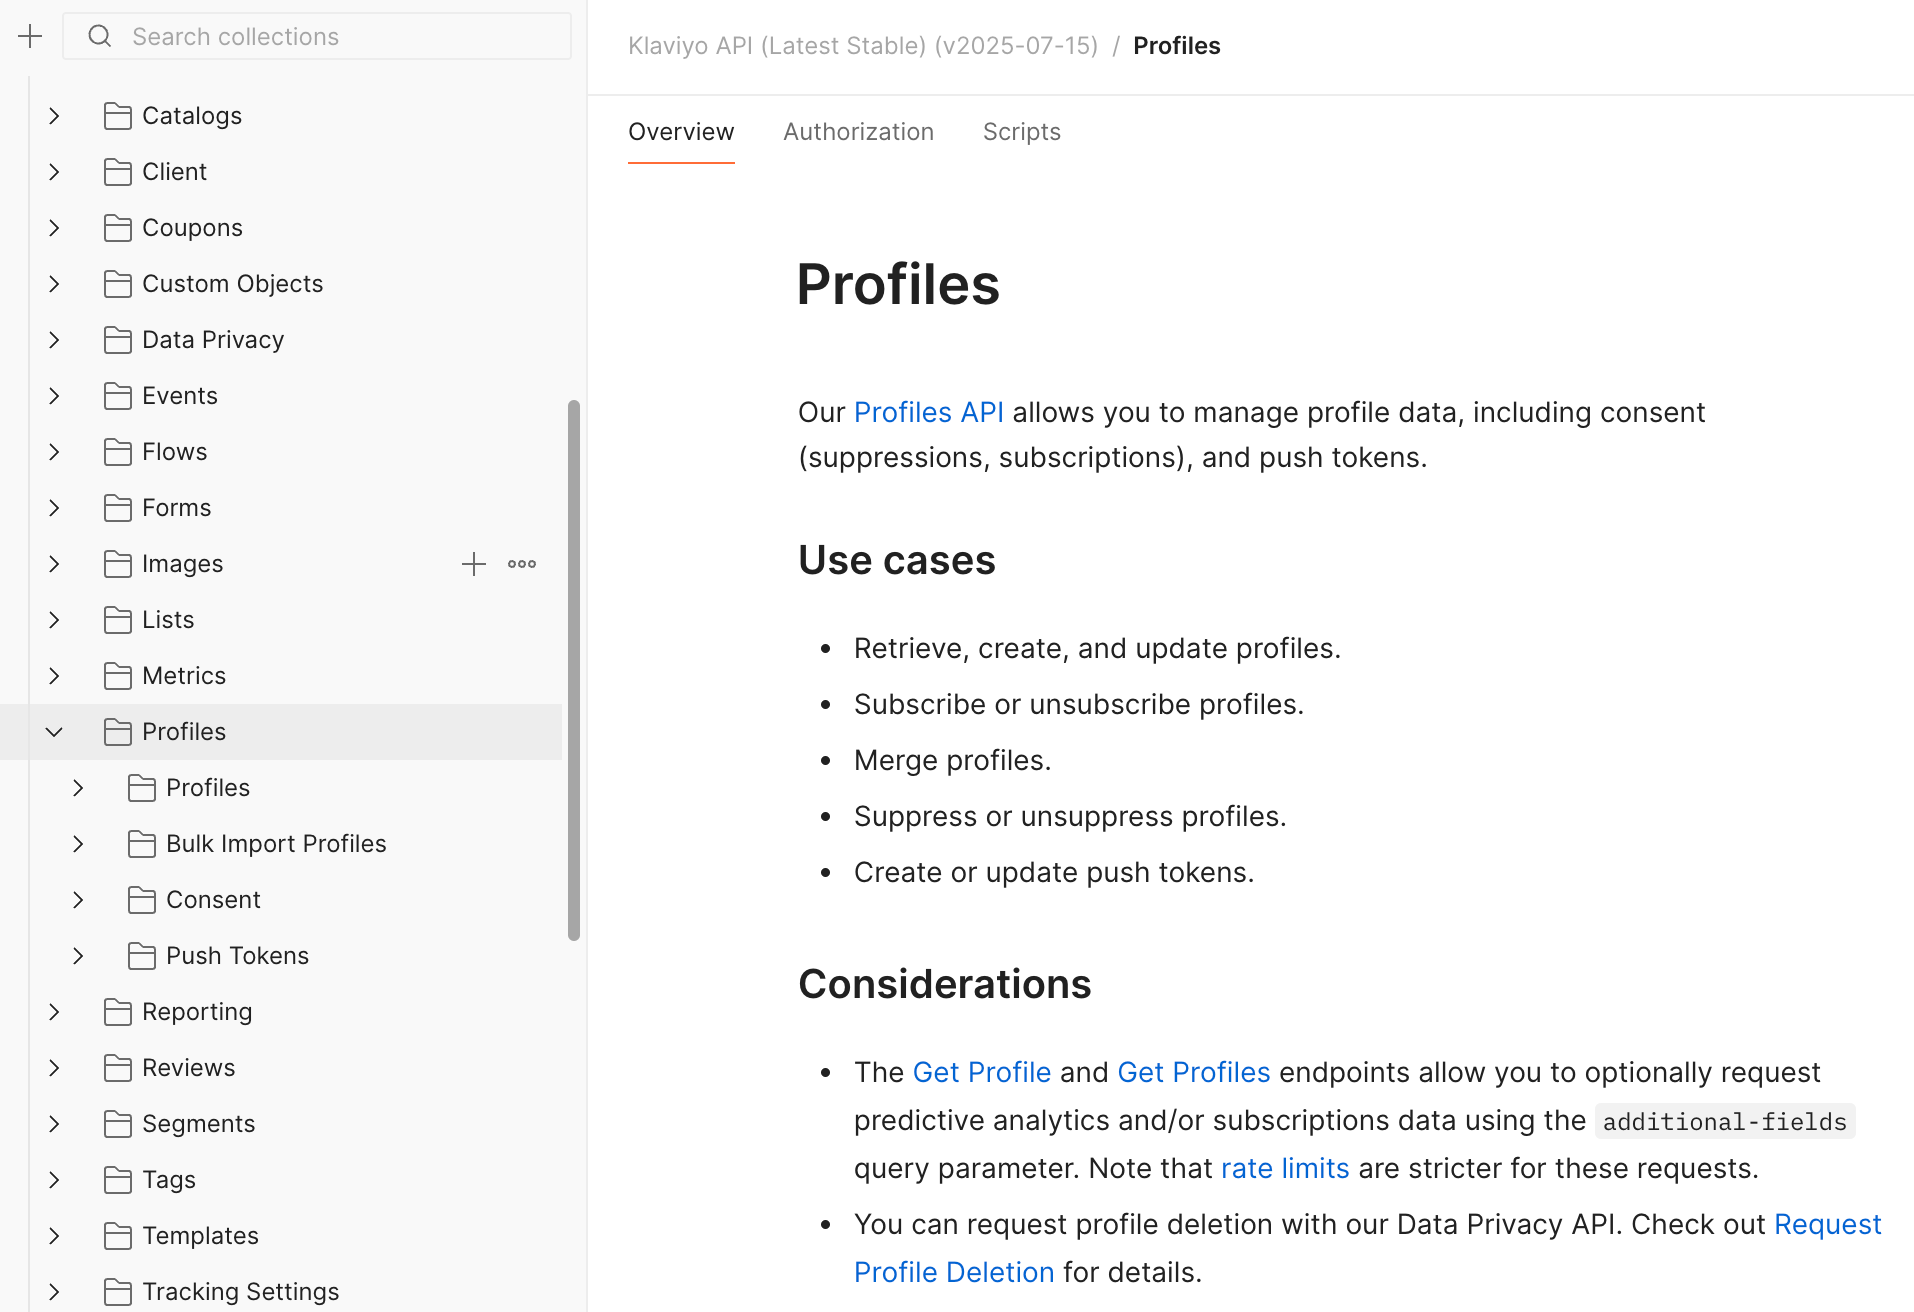
The Profiles API overview on the right includes API’s use cases and considerations. The Profiles folder on the sidebar has also been expanded to reveal its sub-folders, Profiles, Bulk Import Profiles, Consent, and Push Tokens. Click into these folders to make Profiles API requests.
Test API call
Let’s make a test API call to Get Profiles. First, you can view the supported API reference documentation to the right of your workbench where the request will be sent.
- Click on the page icon in the top right of the Postman window.
This will open the Documentation view, as shown below. This view is useful for referencing allowed fields you can filter or sort responses by and related resources and/or additional fields you can include in your response.
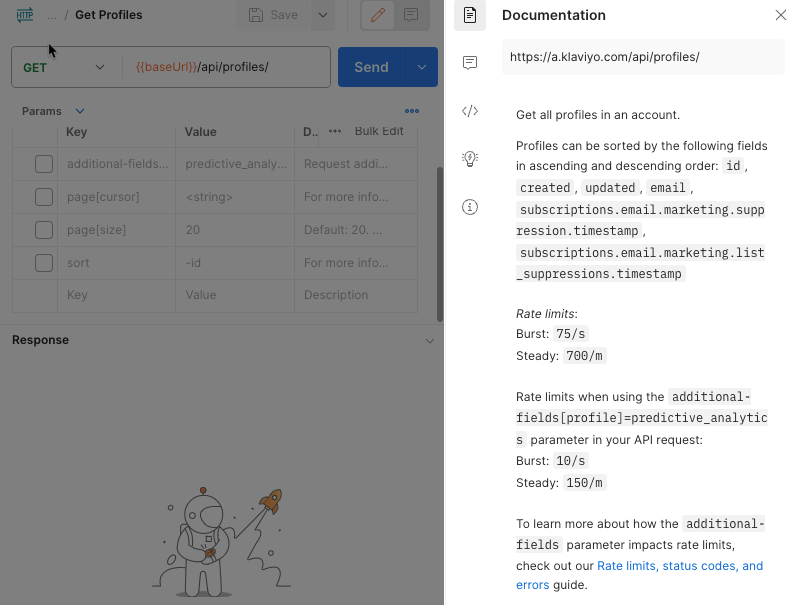
The Params tab contains example queries you can make in your request.
- Select the filter param. This will append the filter parameter to the URL with a placeholder
<string>value, as shown below.

- In the Params tab or in the URL itself, replace
<string>with a valid field and operator pairing. The example query below fetches profiles created after August 10, 2023.
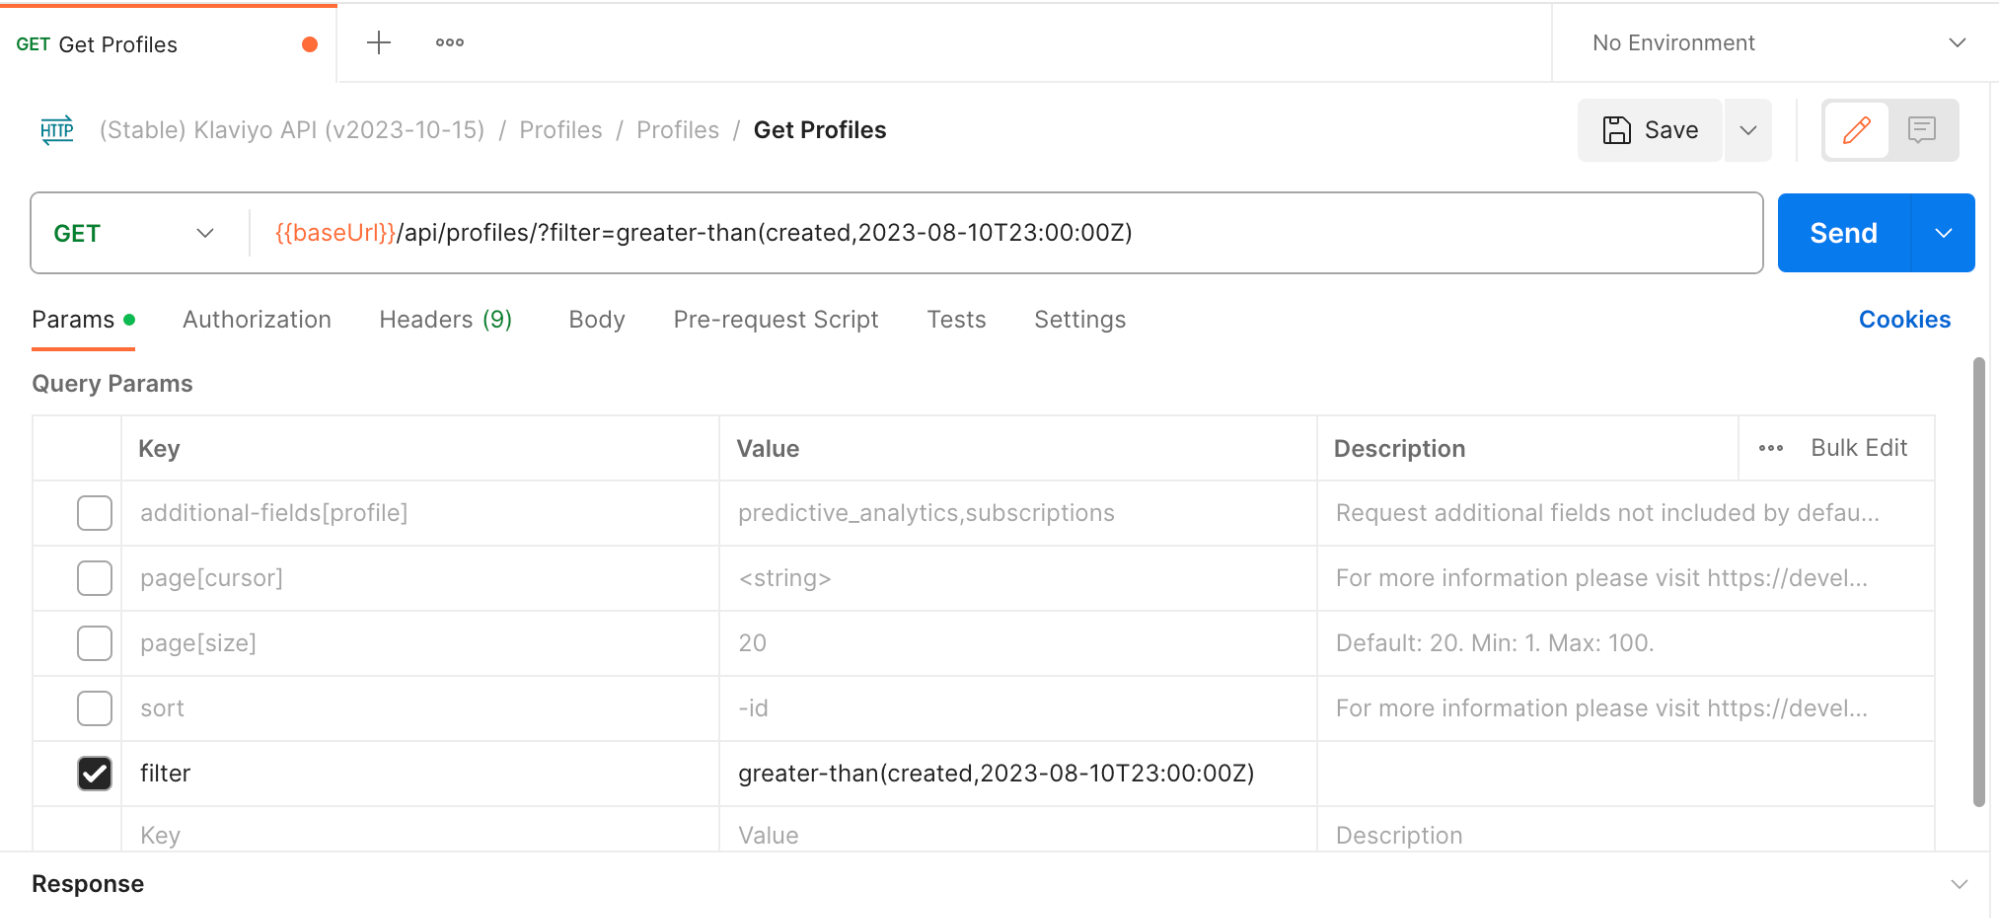
- Click Send.
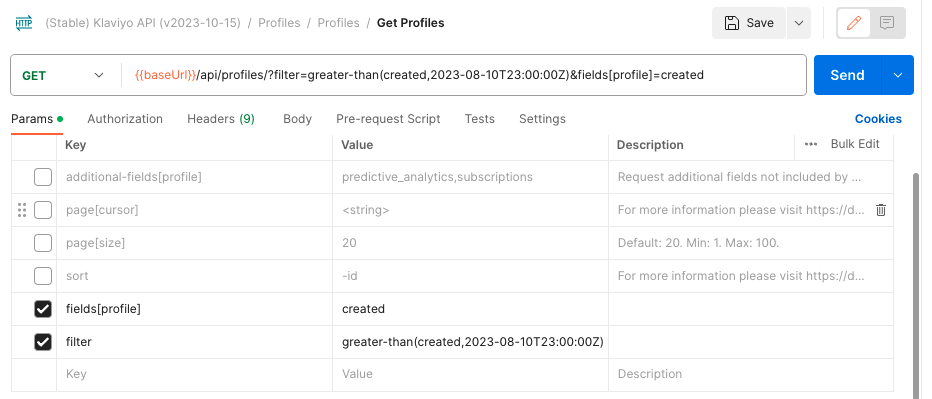
The Body tab contains the response body, as shown below.

Let’s add a sparse fieldsets query parameter to the request URL to return only specified attributes for profiles, e.g., created, in the response and click Send:
The final response will look something like this:
{
    "data": [
        {
            "type": "profile",
            "id": "01H81WC034AKRMQJQARPEEBHJE",
            "attributes": {
                "created": "2023-08-17T13:53:43+00:00"
            },
            "relationships": {
               ...
            },
            "links": {
                "self": "https://a.klaviyo.com/api/profiles/01H81WC034AKRMQJQARPEEBHJE/"
            }
        },
        {
            "type": "profile",
            "id": "01HD2CCW560NWG693CYF6KF28S",
            "attributes": {
                "created": "2023-10-18T21:52:18+00:00"
            },
            "relationships": {
                ...
            },
            "links": {
                "self": "https://a.klaviyo.com/api/profiles/01HD2CCW560NWG693CYF6KF28S/"
            }
        }
    ],
    "links": {
        "self": "https://a.klaviyo.com/api/profiles/?fields[profile]=created&filter=greater-than(created,2023-08-10T23:00:00Z)",
        "next": null,
        "prev": null
    }
}
Save a request
You can save requests to your Postman collection in its API folder or in a custom folder in your collection.
- Click on the downward-facing arrow in the top right (next to Save), and click Save as.
- Provide a request name, e.g., Get Profiles Created Date, and select a folder within the collection, e.g., Profiles.
- Click Save. Confirm your request is in the correct folder in the sidebar.
Copy as code
Postman allows you to copy your requests as code in a supported language of your choice.
- Click on the code icon in the top right of the Postman window.
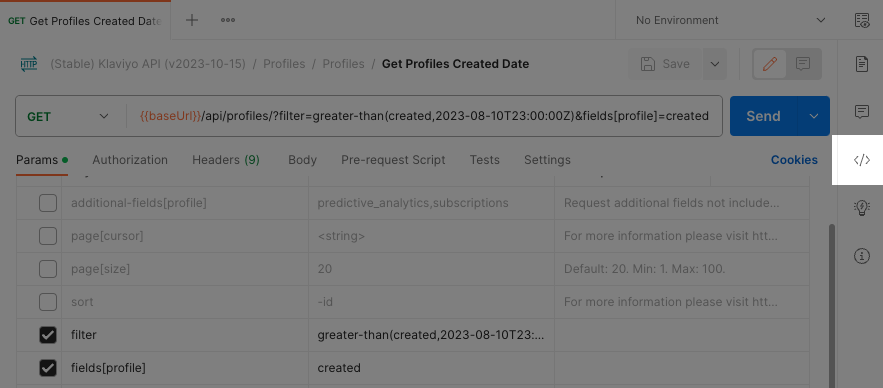
This will open the Code snippet view, which converts your API request into code, as shown below.
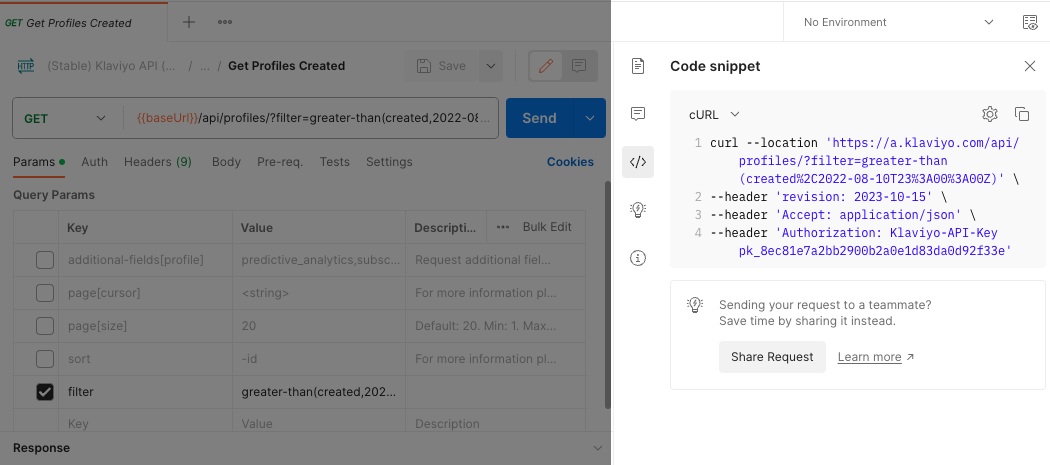
- Toggle the language in the top left corner if needed. Select the copy icon in the top right corner of the code snippet to copy the code to your clipboard.
Troubleshoot errors
Postman makes it easy to see your request status. A successful call will typically have a status of 200 (OK) or 202 (Accepted). If you’re encountering a problem when making an API call, check the status code for a hint at the root cause. Below are error statuses you may encounter with troubleshooting tips to help you fix these errors.
401 (Unauthorized)
A request that returns a 401 (Unauthorized) error is unverified because authorization credentials are missing or invalid, as shown below. Enter the correct API key and credentials, and try again.
{
    "errors": [
        {
            "id": "string",
            "status": 401,
            "code": "not_authenticated",
            "title": "Authentication credentials were not provided.",
            "detail": "Missing or invalid private key.",
            "source": {
                "pointer": "/data/"
            }
        }
    ]
}
403 (Forbidden)
The 403 (Forbidden) authentication error is common when getting started with API calls. An incorrect authentication setup, or invalid or expired credentials, can result in errors when sending your GET and POST requests. If you have used an invalid API key, such as a key missing required scopes, you might see an error message like the following:
{
    "errors": [
        {
            "id": "string",
            "status": 403,
            "code": "permission_denied",
            "title": "You do not have permission to perform this action.",
            "detail": "Your API key is missing required scopes: events:write",
            "source": {
                "pointer": "/data/"
            }
        }
    ]
}
To resolve this issue, double check that you are using the correct private API key.
404 (Not Found)
A request that returns a 404 (Not Found) error may be trying to retrieve information that is not available, or may contain a parameter that is not valid. For example, if you make a call to Get Event for details on a specific event with an incorrect event ID, you may get a 404 error status like the following:
{
    "errors": [
        {
            "id": "string",
            "status": 404,
            "code": "not_found",
            "title": "Not found.",
            "detail": "Event with id 4H7KLscuSr does not exist.",
            "source": {
                "pointer": "/data/"
            }
        }
    ]
}
405 (Method Not Allowed)
The 405 (Method Not Allowed) error can occur when an endpoint does not support a specific HTTP Method. For example, the Events API endpoint https://a.klaviyo.com/api/events does not support the DELETE method. Making a DELETE call to this endpoint will result in an error like the one below.
{
    "errors": [
        {
            "id": "string",
            "status": 405,
            "code": "method_not_allowed",
            "title": "Method \"{method}\" not allowed.",
            "detail": "Method \"DELETE\" not allowed.",
            "source": {
                "pointer": "/data/"
            }
        }
    ]
}
Refer to the API reference documentation for the supported methods of each Klaviyo API.
409 (Conflict)
The 409 (Conflict) error, though uncommon, can result when you attempt to create a resource that already exists. We recommend using a Create or Update endpoint if it exists for the resource you'd like to create or update (e.g., Create or Update Profile for profiles). If this endpoint does not exist for the resource you're looking to create or update, follow these steps:
-
Before creating the resource, check if it already exists using the appropriate GET endpoint for the resource (e.g., Get Catalog Item if the resource is a catalog item).
-
Call the appropriate PATCH endpoint for updating the resource if it doesn't exist (e.g., Update Catalog Item), otherwise create the new resource with its POST create endpoint (e.g., Create Catalog Item).
If you are trying to update a resource and receive this error, you may need to use PUT or PATCH methods depending on your objective for the resource. Keep in mind that some values may not need to be unique. For example, multiple POST requests to create a new list with the name “Newsletter” will result in multiple lists created with the same list name, but unique list IDs.
Outcome
You’ve just made your first Klaviyo API call with our Postman collection.
Additional resources
Updated 3 months ago