Make a test API request
Test your connection to confirm your authentication is working and that your application can connect with Klaviyo's servers.
Test POST request
To check that your integration is working correctly, make a test request to the List API using the code below to create a new list. Replace your-private-api-key with your own private API key. If you are using a test account, first check the key is associated with your test account.
A successful request returns the list ID of the newly created list, as well as its associated attributes.
curl --request POST \
     --url https://a.klaviyo.com/api/lists/ \
     --header 'Authorization: Klaviyo-API-Key your-private-api-key' \
     --header 'accept: application/json' \
     --header 'content-type: application/json' \
     --header 'revision: 2023-02-22' \
     --data '
{
     "data": {
          "type": "list",
          "attributes": {
							"name": "THIS IS REQUIRED"
              }
     }
}
import requests

url = "https://a.klaviyo.com/api/lists/"

payload = {"data": {"type": "list"}}
headers = {
    "accept": "application/json",
    "revision": "2022-10-17",
    "content-type": "application/json",
    "Authorization": "Klaviyo-API-Key your-private-api-key"
}

response = requests.post(url, json=payload, headers=headers)

print(response.text)
<?php
require_once('vendor/autoload.php');

$client = new \GuzzleHttp\Client();

$response = $client->request('POST', 'https://a.klaviyo.com/api/lists/', [
  'body' => '{"data":{"type":"list"}}',
  'headers' => [
    'Authorization' => 'Klaviyo-API-Key your-private-api-key',
    'accept' => 'application/json',
    'content-type' => 'application/json',
    'revision' => '2022-10-17',
  ],
]);

echo $response->getBody();
require 'uri'
require 'net/http'
require 'openssl'

url = URI("https://a.klaviyo.com/api/lists/")

http = Net::HTTP.new(url.host, url.port)
http.use_ssl = true

request = Net::HTTP::Post.new(url)
request["accept"] = 'application/json'
request["revision"] = '2022-10-17'
request["content-type"] = 'application/json'
request["Authorization"] = 'Klaviyo-API-Key your-private-api-key'
request.body = "{\"data\":{\"type\":\"list\"}}"

response = http.request(request)
puts response.read_body
{
  "data": {
    "type": "list",
    "id": "string",
    "attributes": {
      "name": "string",
      "created": "2022-10-19T16:10:03.923Z",
      "updated": "2022-10-19T16:10:03.923Z"
    },
    "links": {
      "self": "string"
    }
  }
}
Test with Postman
Before you begin testing with Postman, check out our guide on how to use our Postman collections. Fork our latest collection of prebuilt API requests into your personal workspace to get started.
To confirm that your application can send data to Klaviyo, open the Lists & Segments folder and select the Create List POST request. Replace your-private-api-key with a private API key from your account. If you are using a test account, first check the key is associated with your test account.
When you are ready, click Send. A successful request returns the list ID of the newly created list.
{
  "data": {
    "type": "list",
    "id": "string",
    "attributes": {
      "name": "string",
      "created": "2022-10-19T16:10:03.923Z",
      "updated": "2022-10-19T16:10:03.923Z"
    },
    "links": {
      "self": "string"
    }
  }
}
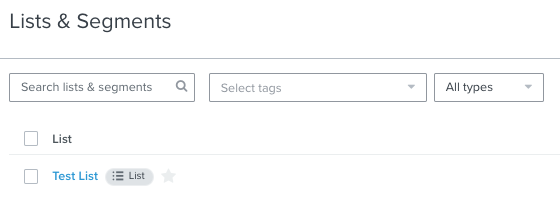
Confirm success in account
Double-check that your test request successfully created a list in your preferred account. While logged in to your account, navigate to Lists & Segments a search for the name of your newly-created list to verify.
Updated over 1 year ago