Custom trigger a popup or flyout form
Learn how to create a Klaviyo popup or flyout form with a custom trigger on your site. To implement this, you’ll use a Klaviyo client side API for triggering forms.
Before you begin
- To enable Klaviyo forms, including custom triggered forms, you must have Klaviyo’s onsite tracking JavaScript, known as Klaviyo.js, installed on your site. This is the same snippet that enables Klaviyo’s Active on Site tracking. Learn how to install Klaviyo.js for your ecommerce platform.
- Before starting, create your signup form in Klaviyo.
- Set your Form Type to Popup or Flyout. Embedded forms cannot be custom triggered.
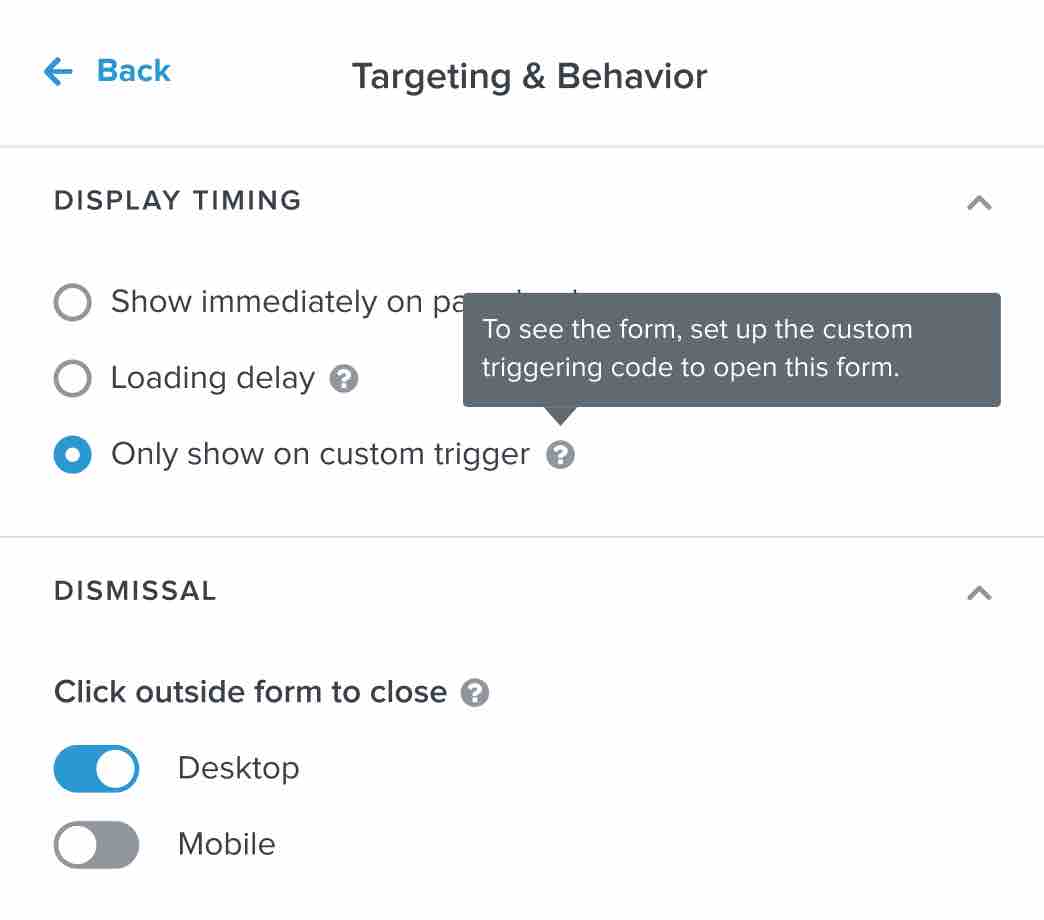
- In the Targeting & Behavior tab, under Display Timing, select the option Only show on custom trigger.
If you choose a different Display Timing setting, the custom trigger code will still work; the form will open on whatever trigger comes first. Additionally, if you choose other targeting settings for your form, such as By Visitor or By URL, the custom trigger form will override them once its trigger is met.
 5. Click Publish.
Access the open form code
- Open your signup form in Klaviyo
- Click Targeting & Behavior
- Scroll down to the Custom Trigger section and copy the code snippet that appears there, as shown below
window._klOnsite = window._klOnsite || [];
window._klOnsite.push('openForm', 'FormID');
The FormID will be the ID of your form, which can be found at the end of the form editor URL.
It is important to note the following:
- Your form must be live in order for it to open.
- When a form has an ongoing A/B test, this API simply triggers the form’s display. It is your A/B testing logic, which is separate, that determines which variation displays. If you have an A/B test where a variation of your form has a custom trigger, you will still need to add custom trigger code to your site.
Customize the open form code
You can choose to use the function within the code you copied from Klaviyo, _klOnsite.push, to open your form, or you can replace it with the function _klOnsite.openForm instead, depending on the needs of the trigger you select.
-
_klOnsite.openFormwill only execute if Klaviyo.js has loaded on your site. Otherwise, it will fail._klOnsite.openFormshould only be used when you want to trigger a form based on user input, such as a button click (not a trigger that requires execution immediately on page load)._klOnsite.openFormrequires one parameter, which is your Form ID. Your code will look like this:
_klOnsite.openForm('FormID')
-
_klOnsite.pushcan execute before Klaviyo.js loads (though Klaviyo.js still needs to be installed on your site)._klOnsite.pushrequires two parameters: openForm will be the first parameter, and your Form ID will be the second parameter. Your code will look like this:
_klOnsite.push('openForm', 'FormID')
You can add an optional extra parameter as a callback that will execute when your form triggers. This extra parameter can be added to either the .push or the .openForm call.
For example, we’ve added a logging parameter here:
_klOnsite.openForm('FormID', () => console.log('you triggered the form!'))
Add your form trigger
In order to trigger your form, you’ll need to add a custom script to your website leveraging the form opening code.
Your form trigger can be whatever you’d like, such as a button click, or on page load, but only for specific visitors based on their properties.
In the next section, we’ll provide an example of using a button to trigger your form.
Example: button-triggered form
You can trigger your form open via a button click.
In this example, our button code looks like this:
<button class="klaviyo_form_trigger">Click here<button>
You can always customize your trigger code to fit a pre-existing button, or customize our example button code to add a new button to your site.
Set up your script and add an event listener that uses document.querySelector, document.getElementsByClassName, document.getElementByID, or similar to watch the button for a click. Here is our example script:
<script type="text/javascript">
document.querySelector(".klaviyo_form_trigger").addEventListener('click',function (){
		window._klOnsite = window._klOnsite || [];
 		window._klOnsite.openForm('FormID', () => console.log("you triggered the form!"));
	});</script>
Note that if you add multiple forms triggered by separate buttons to your site, you’ll need to use a unique button ID or class name for each button (e.g., klaviyo_form_trigger1, klaviyo_form_trigger2).
Test your trigger
Once you’ve saved all the changes to your site’s code, visit your site and test your form’s trigger. When you test this code, the signup form will appear.
Having trouble? Head to Klaviyo’s Community for guidance from other Klaviyo users.
Additional resources
Updated over 1 year ago